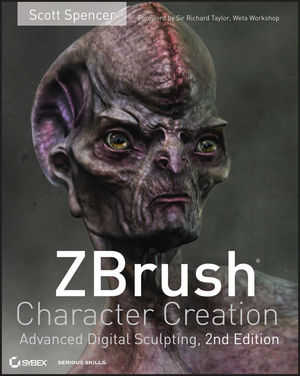
ZBrush Character Creation: Advanced Digital Sculpting, 2nd EditionISBN: 978-0-470-57257-3
Paperback
432 pages
February 2011
 This title is out-of-print and not currently available for purchase from this site.
|
Foreword xv
Introduction xvii
Chapter 1 Sculpting, from Traditional to Digital 1
Gesture, Form, and Proportion 1
Gesture 1
Form 4
Proportion 7
Best Practices for Digital Sculpting 7
ZBrush Interface General Overview 8
Masking and Visibility Brushes 15
Using the ZBrush Tools 16
Creating a 2.5D Pixol Illustration 17
Sculpting a Lion’s Head 18
Adding Subtools 22
Refining Your Model 25
Finishing Your Model 30
Creating a 2.5D Pixol Illustration 30
Chapter 2 Sculpting in ZBrush 33
An Approach to Sculpting 33
The Brush Menu 35
The Brush Menu 38
Saving Custom Brushes 43
The Clay Brushes 44
The Polish, Planar, and Trim Brushes 47
The Écorché Approach to Sculpting 49
Saving Your Work 51
Sculpting the Skull 51
Measuring with the Transpose Line 53
Roughing in the Shape of the Skull 54
Sculpting the Forms of the Facial Mass 55
Sculpting the Muscles 58
Adding the Eyes 62
Sculpting Skin and Fat on the Face 66
Adding the Neck 69
Sculpting the Neck Muscles 69
Sculpting Ears 71
Chapter 3 Designing a Character Bust 79
ZBrush and Working with Imported Meshes 80
Optimizing Meshes for ZBrush 82
Increasing Polygon Counts with Local Subdivision 86
Importing and Preparing a Mesh for Sculpting 87
Using Polygroups to Organize Your Mesh 88
Setting Up GoZ and Subtool Master 94
Installing GoZ 94
Sculpting a Character Bust 94
Adding Geometry Using Mesh Insert 99
Advanced Techniques: Sculpting the Demon Beast 102
Adding Geometry for the Horns 108
Refining the Character Bust 112
Chapter 4 ZBrush for Detailing 119
Form and Details 119
Alphas 121
Alphas and Strokes 125
Alphas as Stencils 129
ZAppLink Stencils 132
Importing Images to Use as Alphas 133
Sculpting Alphas in ZBrush 135
Details and Layers 136
Detailing the Stingerhead with Alphas and Stencils 139
Sculpting Fine Details with HD Geometry 148
Creating Bump Maps with HD Geometry 152
Another Take on Detailing 156
Chapter 5 Texture Painting 163
UVs in ZBrush 163
The Texture Menus 166
UV Projection Texture Method 169
What Is Polypainting? 170
Painting a Creature Skin 172
Color Theory 172
Making a Custom Spray Brush 174
Blocking in Temperature Zones of the Face 175
Mottling Pass 176
Base Color Washes 178
Temperature Adjustment 179
Projection Master for the Stinger 181
ZAppLink 184
Baking Polypaint to UV Texture Space 187
ZAppLink Views 188
SpotLight for Texture Painting 189
Polypaint with HD 196
Extracting Maps from the HD 197
UV Master Plug-in 198
Control Painting Tools 200
Chapter 6 ZSpheres 205
Introducing ZSpheres 206
Drawing a Simple ZSphere Chain 207
Moving, Scaling, and Rotating ZSpheres and Chains 210
Building a ZSphere Biped 211
Making Hands and Feet 216
Adaptive Skin Controls 216
Adding Edge Loops to the Head 220
Chapter 7 Transpose, ZSphere Rigging, Retopology, and Mesh Extraction 225
Moving and Posing Figures with Transpose 225
The Action Line 226
Topology Masking 229
Posing a Figure 230
Posable Symmetry 235
Transpose Master 235
Retopology 237
Preparing for Retopology 237
Using the Topology Tools 238
Importing Topology: Three Methods 241
Project All and the ZProject Brush 242
Importing a Mesh Directly 246
Changing Topology with GoZ 248
Topology Tools Advanced Applications 250
Building Accessories with Topology Tools and Mesh Extraction 250
Making a Shirt with Mesh Extraction 254
Adding Suspenders with ZSphere Subtools 256
ZSphere Rigging 258
Transpose Measuring 262
Chapter 8 ZBrush Movies and Photoshop Composites 267
ZMovie 267
Recording the Screen 267
Turntable Animations 270
Introducing the Timeline 271
ZBrush to Photoshop 278
Setting Up the Canvas and Placing the Character 278
Creating Render Passes 279
Photoshop Compositing 283
Loading the Renders as Layers 283
Punching Up the Details 284
Painting Eyes 286
Finishing Touches 288
Chapter 9 Normal Maps, Displacement Maps, Maya, and Decimation Master 295
What’s a Difference Map? 295
Displacement Maps 296
Normal Maps 297
Exporting Directly from ZBrush to Maya Using GoZ 297
Installing GoZ 297
Exporting to Maya Using GoZ 297
Exporting to Maya Using Displacement Maps 301
Rendering Displacement in Maya with mental ray 302
Exporting Your Model from ZBrush Manually 305
UVs and Vertex Order 306
Generating Displacement Maps 310
Accessing Your Original Mesh Shape 311
Making 16-Bit Maps 311
Making 32-Bit Floating-Point Maps 313
Multiple Maps per UV Region 313
Displacement Menu Options 313
Processing Displacement Maps for Use in mental ray 315
Setting Up Your Scene for Displacement 316
Setting Up Single 32-Bit Displacement Renders in Maya 316
Setting Up Multimap 32-Bit Displacement Renders in Maya 322
Setting Up 16-Bit Displacement Renders in Maya 324
Applying Bump Maps in Maya 325
Common Problems When Moving into Maya 326
Troubleshooting Renders and Artifacts 327
Normal Maps 328
Rendering Normal Maps in Maya 330
Maya Normal Map Setup 331
Cavity and Ambient Occlusion Maps 333
Creating Maps Using Multi Map Exporter 335
Exporting with Decimation Master 338
3D Printing 340
Chapter 10 ZSketch and Hard-Surface Brushes 343
ZSketch 343
Hard-Surface Sculpting 361
Hard-Surface Brushes 361
ShadowBox, Group Loops, and Matchmaker 366
Create a Ray Gun 375
Appendix About the Companion DVD 395
What You’ll Find on the DVD 395
Chapter Files 395
Bonus PDFs 395
System Requirements 396
Using the DVD 397
Troubleshooting 397
Customer Care 397
Index 398


