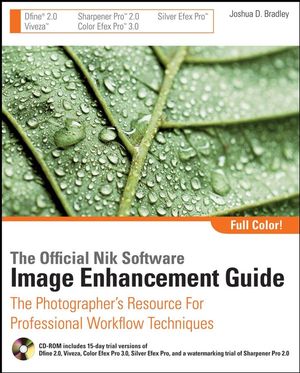
The Official Nik Software Image Enhancement Guide: The Photographer's Resource for Professional Workflow TechniquesISBN: 978-0-470-28763-7
Paperback
272 pages
October 2008
 This title is out-of-print and not currently available for purchase from this site.
|
Contents.
Introduction.
Conventions.
PART I: How to Use the Nik Tools.
Lesson 1: Installing the Plug-ins.
Lesson 2: Using Dfi ne 2.0.
Lesson 3: Using Viveza.
Lesson 4: Using Color Efex Pro 3.0.
Lesson 5: Using Silver Efex Pro.
Lesson 6: Using Sharpener Pro 2.0.
Lesson 7: Getting the Hardware Needed.
PART II: Silencing Noise and Fine-Tuning.
Lesson 1: Reducing an Entire Image’s Noise.
Lesson 2: Fighting Noise with Color Selections.
Lesson 3: Precise Noise Reduction with Control Points.
Lesson 4: Finishing an Image in 20 Seconds.
Lesson 5: Quickly Eliminate Unwanted Color Cast.
Lesson 6: Getting an Image Ready for the Next Step.
PART II Finishing with Color Efex Pro 3.0.
Lesson 1: Using Bi-Colored Filters for Realism.
Lesson 2: Creating Dramatic Sunrises and Sunsets.
Lesson 3: Making It Old with Bleach Bypass.
Lesson 4: Edgy Look with Bleach Bypass.
Lesson 5: Using the B/W Filter.
Lesson 6: Spot Color and Portraits.
Lesson 7: Spot Color and Landscapes.
Lesson 8: Antiquing with Color Stylizer.
Lesson 9: Focus with Darken/Lighten Center.
Lesson 10: The Artifi cial Snoot.
Lesson 11: Duplex and Portraits.
Lesson 12: The Graduated Neutral Density Filter.
Lesson 13: Black-and-White Infrared, Method 1.
Lesson 14: Black-and-White Infrared, Method 2.
Lesson 15: Art Deco and Color Method in Infrared.
Lesson 16: Setting the Tone with Paper Toner.
Lesson 17: Dramatic Photo Stylizer.
Lesson 18: Refl ections without the Light.
Lesson 19: Tonal Contrast Using Color and Contrast.
Lesson 20: Tonal Contrast Using the Airbrushed Look.
PART IV: Multiple Filters, Multiple Programs.
Lesson 1: Creating Brilliant Landscapes.
Lesson 2: False Flash and Old Photos.
Lesson 3: Creating Neon Light, or Any Light.
Lesson 4: Bring on Indian Summer and Contrast.
Lesson 7: Surreal Art with Bleach, Darken, and Viveza.
Lesson 8: Finishing Black-and-White with Glamour Glow.
Lesson 9: Getting a Great Wedding Glow.
Lesson 10: The Ultimate Wedding Filter Stack.
Lesson 11: Rock and Roll Spotlight.
Lesson 12: The Evil Grunge Look.
Lesson 13: Creating an Ethereal Look.
Lesson 14: Classic Rock Effect.
Lesson 15: Gritty Color Stylizer Effect.
PART V: Silver Is the New Black.
Lesson 1: Creating a Solarized Effect.
Lesson 2: Solarized Portraits.
Lesson 3: Silvering for Effect in Black-and-White.
Lesson 4: High-Contrast Black-and-White.
Lesson 5: Creating a Black-and-White Portrait with Sepia.
Lesson 6: Dramatic Landscape.
Lesson 7: Creating a Pinhole.
Lesson 8: Going for the Classic Black-and-White.
Lesson 9: Bringing Back Tintype.
Lesson 10: Silver Free-for-All.
PART VI: Having a Sharp Eye.
Lesson 1: Raw Pre-Sharpening Filter Preset.
Lesson 2: Sharpening for Effect.
Lesson 3: Isolating Details for Sharpness.


